
Cutout an image in Photoshop is similar to cutting out pictures from newspapers or magazines. One is digital methods, and another is a manual process. However, Photoshop is a world-leading photo editing software. You will get many valuable tools to edit your photos using Adobe Photoshop. I will explain how to cut an image in Photoshop using the clipping path. There are a few background removal tools; you can remove your image background by using them. Here I will use the pen tool to create a clipping path around the product.
Now the question is, why will I use the pen tool? Ok, Every Photoshop tool has its individual uses. It depends upon image complexity and its nature. You will see that some images are hairy and furry, some image edges are smooth, some image background is multi-colored, and some photos have many curve edges. For the different complexity of the image, we have to apply additional editing techniques to cut out image backgrounds. For this tutorial, I will choose an effortless product complexity for the batter to understand, and the pen tool is the best match for those types of images.
Here I will show you a few easy steps for cutting out an image in Photoshop; if you are new to Photoshop, No worries! You can take the challenge. You must keep only one thing in mind ” Practice makes a man perfect.”
Video Tutorial | Clipping Path to Cut Out Image
You may be interested in reading about the Best tablet for photoshop. This article will give you an in-depth review of a tablet with pros and cons.
Easy Steps to Cut Out an Image in Photoshop
A clipping path is a popular method to cut out an image background. To create a perfect clipping path, we will use Photoshop Pen Tool. Here I will explain the process of using the pen tool to create a clipping path and how to cut the image background. The wonderful thing about this is you can use this tool in full of your control. Let’s start.
STEP 1
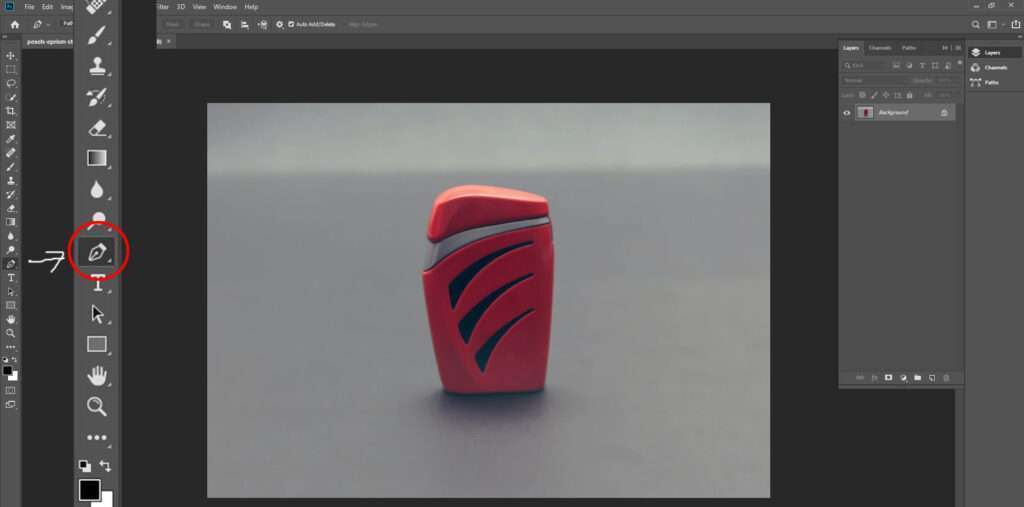
This tutorial will use Photoshop CC and regular complex photos ( royalty-free images). First, you will need to open the picture in Adobe Photoshop CC (you can use the older version, too, no problem), In which one you wish to cut out the objects from the background. Select the pen tool from the tools bar (See the image below ). You will see I marked it as a red circle.
STEP 2
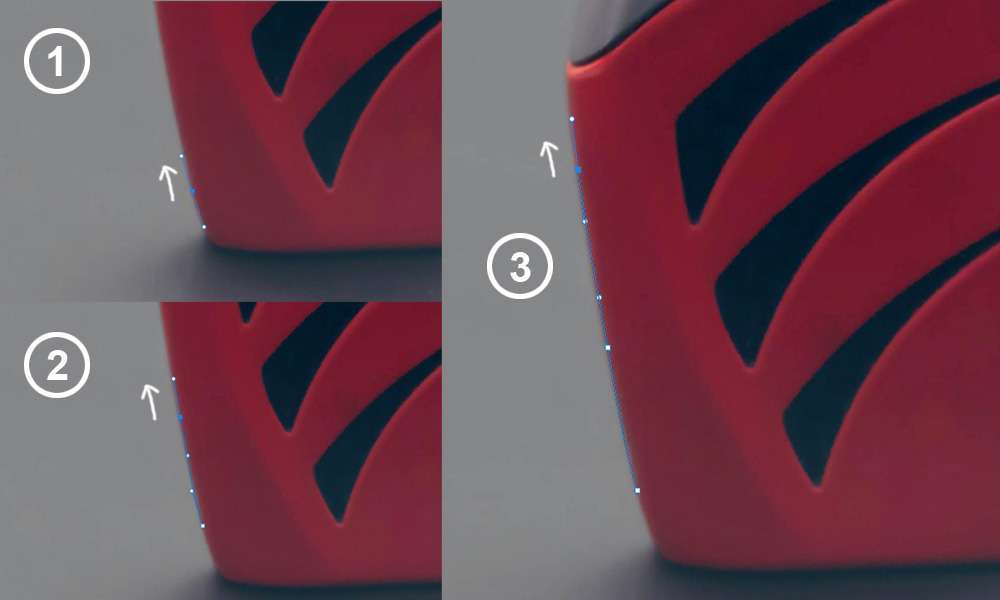
After selecting the pen tool, try to draw a line by following the edge of the product. If you are new to photoshop, you will think it is difficult to remove, but believe me, it’s not so hard. Try once again and again. Follow the image below and the pen tool movement directions to draw a line with the pen tool. After a few timed practices, you will see the magic of your expertise.
One important thing is that when breaking the scale to change the path direction is necessary, you have to press the Alt button to do this.
So, now you can draw the line by following the edge of the product ( Congratulations! ), do it in the other area, and join the finish line with the starting point. That’s it. The image below gives you an idea of how to do it.
STEP 3
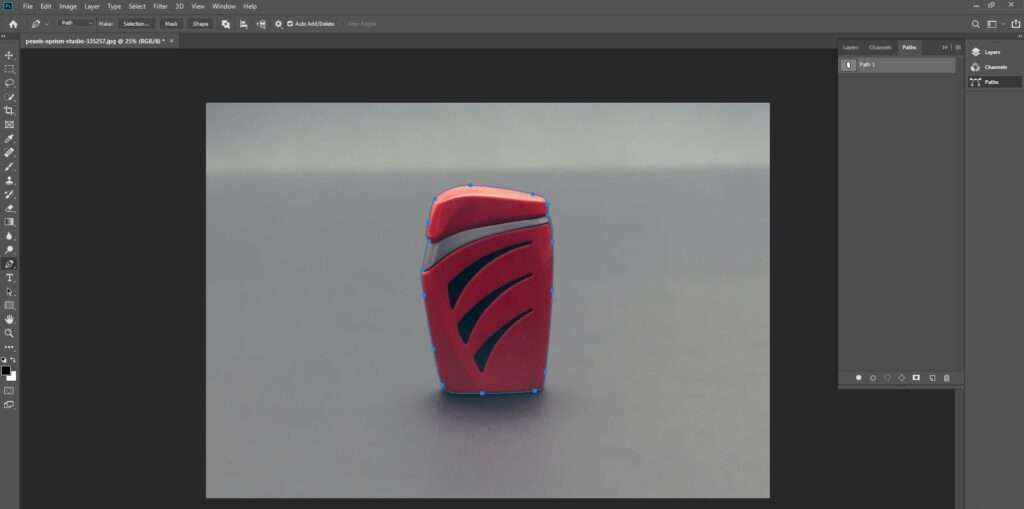
Already you have overcome The most complicated part of the selection. Now you have the outline all around the product, and you are ready to can cut the image background by using this clipping path. Look like the below image.
STEP 4
Let’s see How to Cut Out an Image in Photoshop using the clipping path. First, press and hold the Ctrl button. At the same time, click on the path layer ( see the red circle) after doing this process. You will see the result in the selection area, like the image below.

STEP 5
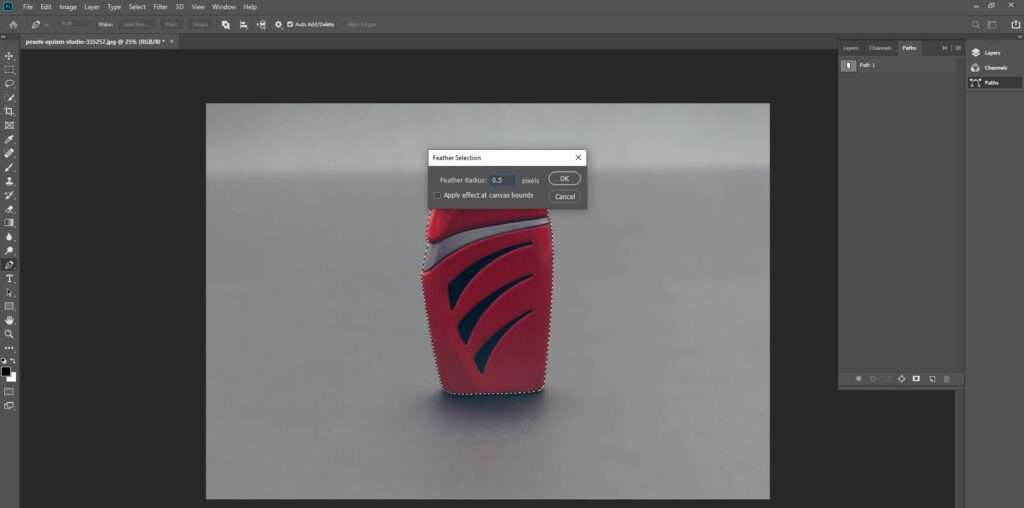
Now, press the (Ctrl + Alt + D) at a time, and you will see a box pop up to input the flatness parameter. It is essential for a smooth edge after cutting the object. You can make it high or low depending on the image quality and your need. I will put here 0.5 px for this image. After that, click on the OK button. See the screenshot below:
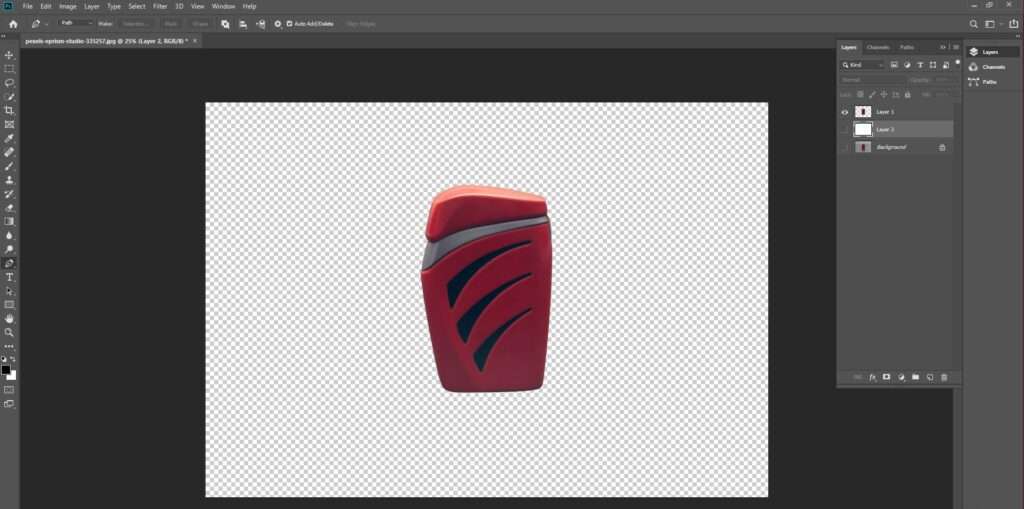
STEP 6
Now Press (Ctrl + J) to cut out the object from the background, creating a new layer with only the selected object. So, now you can take another new layer under the object layer, and In this layer, you can put any color or background as per your need. See the result below:
Final Words:
We already discussed the multiple options for the image background removal techniques. The clipping path to create a selection around the object is a widespread technique in the photo industry. Through this process, you can make your image background transparent. It will allow you to save the image in PSD, PNG, or TIF with transparent background.
Thank you for being with us and checking out this tutorial. You are welcome to check our other helpful content too.
1 comment
I think this is among the most vital info for me. And I am glad to read your article. But should remark on some general things. I must say, I am very impressed with your writing skills and also with the layout of your blog