
Photoshop is a popular platform used in the design and photography industries, allowing for endless creativity. Within these industries, plenty of tools are beneficial for breaking down the process. Adobe Photoshop is one of the best photo editing software to do the same. We can use it on Windows and Mac. There are many useful Photoshop tools and functions to minimize your time to create any creative image. For example, when you want to take stunning pictures with transparency, you can use the photoshop pen tool. You can convert your ordinary photo into a realistic one by using a bunch of photoshop retouching tools. It also provides multiple-image and smart-filter options to merge images and adjust the picture colours. This particular tool is perfect for those who want to edit their photos without too much hassle. You can quickly go back and forth between filters and layer adjustment options.
Adobe Photoshop also comes with some essential image retouching tools that can be useful for beginners, who need to remove blemishes or straighten an image. While the tools are simple, you have little control over what you can do with them. You should look into some additional Photoshop plugins if you want more control over retouching your photos.
How Long Does it Take to Learn Photoshop?

There are many valuable tools for designers and amateurs alike to use. Learning Photoshop is not rocket science. This article will explore the basics and introduce photoshop tools. It will help beginners to understand the uses of every instrument. The tools that can be used in photoshop are categorised into different sections. To learn photoshop tricks using the necessary tools, you must be dedicated and determined to understand them. You know, practice always makes your skill perfect. It is not easy to decide the time frame to learn Adobe Photoshop properly. But only you can do this.
One of the most important things you should remember is to get the basics right. Many people are so keen to learn advanced features of Photoshop that they get trapped in using many elements together, which is not a good idea. Here are some key areas where you need to concentrate more on learning Photoshop properly. The first thing you need to know about Photoshop is proper selection techniques. Photoshop is all about making selections of elements, so start by learning how to use essential selection tools properly. Learn a good workflow for clipping path, masking, colour adjustment, and how to work with layers and layer masks.
Photoshop Tools and Functions Overview
Photoshop is software that is often used for editing digital images. It’s a collection of tools you can use to tweak, edit, and enhance your photos and assist with some projects. In this article, we will look at a list of some photoshop tools and briefly discuss what they do. Those tools are so easy to use and provide most of the functionality that you might want to accomplish. They are used to manipulate the image in different ways. You can change what they show or hide, merge them, cut them into smaller pieces, paint on them with brushes, apply filters, distort them with warps, and more. We will deal with them one by one in the list below.
Move Tool
Photoshop users have many ways to achieve the desired effect, but one of the most underutilised is the Photoshop Move Tool. The Move tool is a tool for changing the position of objects on the Photoshop canvas. The Photoshop Move Tool is a tool for manipulating objects. To use the Move Tool, click on it in the Tools panel. It looks like a cross with arrows (see below). You’re changing its position when you click and drag an object with the Move Tool.
Marquee Tools
Photoshop’s marquee tools are built to make partial selections, cut things out of backgrounds, or extract details from one element. These tools are more advanced than the essential selection tools but are still incredibly easy to use. If you need to edit a photo, design something on your computer, or build a website, these tools are the ones you may want to use.
=> The Rectangular Marquee Tool
Photoshop rectangular marquee tool is the selection tool to adjust and enhance image objects and typography. When you want to apply this tool, you must select the layer that you want to edit. It will allow you to cut or select an individual area of any object from your image as a square shape.
=> The Elliptical Marquee Tool
One particular tool that is not only beginner-friendly but also potent is the elliptical marquee tool. The elliptical marquee tool is a great tool to use for removing backgrounds from images. It will allow you to cut or select an individual area of any object from your image as a circle shape.
=> The Single Row Marquee Tool
Marquee tools allow us to select photo parts and change their shape.
We can use Photoshop’s single-row Marquee Tool to make a box or a straight line. A yellow or pink rectangle will appear on the screen when you click and drag the cursor. It will be constrained to one row unless an arrow is connected, which will allow the selection to be rotated.
=> The Single Column Marquee Tool
The single-column marquee tool is often used to select or edit specific areas of an image or create selections for use in another edit. Everyday use for this tool would be to make selections for an easy cut-out in a snap. It will create a square or rectangular section, depending on the cursor’s shape when you click on the image. Click and drag the Single Column Marquee Tool to create a vertical or rectangular selection.
Lasso Tools
Photoshop offers three Lasso tools: the Regular Lasso tool, the Polygonal Lasso tool, and the Magnetic Lasso tool. Those Lasso tools have their particular purpose of selection. You may need to use all three of them on occasion. The following sections explain each of the Lasso tools.
=> Lasso Tool (Regular)
The regular Lasso tool allows you to select a freeform selection of an image, such as a face or body part. Lasso tool does not automatically close the selection. Instead, you must click on the starting point and the last point. While using Lasso, select pixels that are similar in colour, or the selection will be poor.
=> Polygonal Lasso Tool
The Polygonal Lasso tool allows you to make a straight line selection. This tool will enable you to make a selection using either consecutive lines or freeform curves. It’s designed to select from irregularly shaped objects, as the freeform curve option allows for precise quotes.
=> Magnetic Lasso Tool
The Magnetic Lasso tool uses the edge of an object to determine the next spot to select (which works surprisingly well). These lasso tools are used for choosing irregular areas in an image, while the Magnetic tool helps you make curved lines around objects in your photo. The Magnetic Lasso tool selects the edges of things in a snap.
Selection Tools
In Adobe Photoshop, we will find two particular types of selection tools. One is a quick selection tool, and the other is a magic wand selection tool. Those have different facilities to create the necessary selection. As per need, we can use them when we edit any images.
=> Quick Selection Tool
The Quick Selection tool is excellent for making quick selections, especially from large areas of solid colours. For example, If you have a photo with the sky and a building with some trees. You can use it to select a quickly changing section of the sky and then mask the selection to reveal details in the building and tree branches. Click the Quick Selection tool in the Tools panel. Drag to select an area of the sky; see this magic too.
=> Magic Wand Tool
The Magic wand Tool is powerful and versatile. You can select an area of similar tone and colour with a few clicks of the button. You can also feather the selection into the surrounding areas. The Magic Wand Tool will automatically become active if you switch to one of these tools while working on an assignment.
Crop Tools
Adobe Photoshop provides users with a set of crop tools with different editing facilities. We can control our editing process by using appropriate tools for specific needs. It’s used for various tasks, including fixing photos, adjusting text and removing unwanted elements.
=> Crop Tool
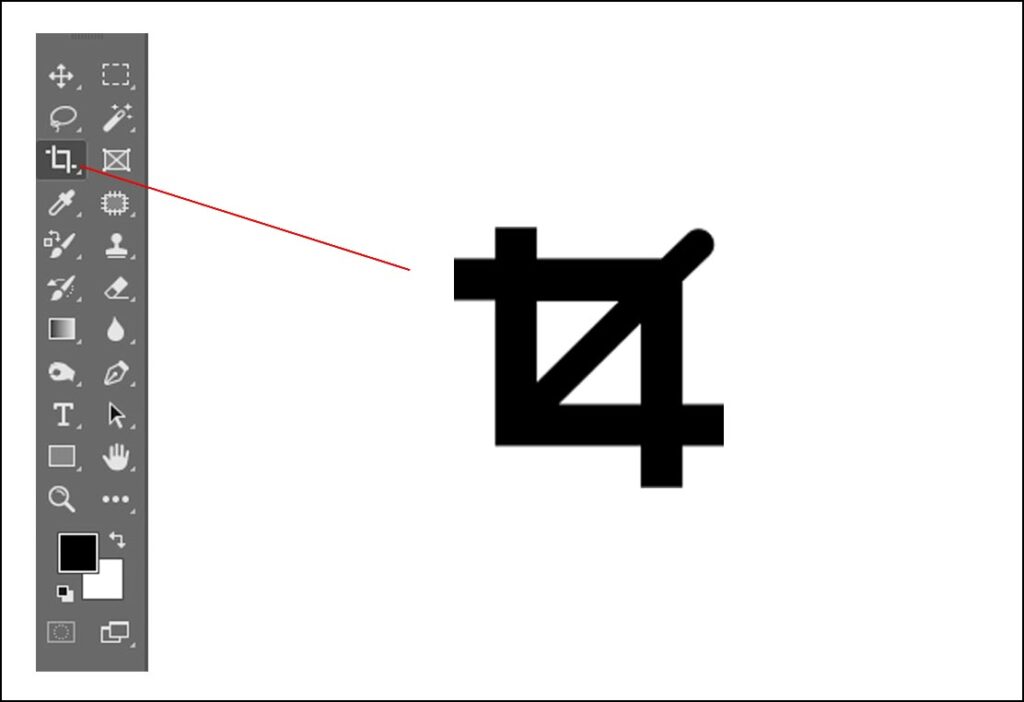
The Crop Tool allows you to select a specific area of an image and crop out the rest. While it may seem simple, the Crop Tool can be challenging to master. The main thing to remember is that the Crop Tool is designed to crop images. It will not resize them. To use the Crop Tool, click and drag it over the area you want to cut. The Crop Tool will automatically snap to the edges of the image.
To adjust the size of the Crop Tool, click and drag one of the handles. When you are done, click the check mark in the Options Bar. The crop tool will crop your image; if you want to cancel the crop, press Esc on your keyboard.
=> Perspective Crop Tool
The Perspective Crop Tool is one of the most difficult Photoshop tools to master. It allows you to crop an image in perspective, which can help create specific effects. However, it’s also effortless to make mistakes with this tool, so it’s essential to know how to use it correctly. The Perspective Crop Tool is located in the Tools palette under the Crop Tool. To select it, click on it.
Once you have selected the Perspective Crop Tool, your cursor will change into a crosshair. To use the tool, click and drag it across the image. As you do this, you’ll see a grid appear. This grid represents the perspective of the image.
=> Slice Tool
The Adobe Photoshop Slice Tool is one of the most difficult Photoshop tools to master. It allows you to divide an image into smaller sections, which can then be saved as individual images. The slice tool can be beneficial for creating web graphics, but it can also be very challenging to get the desired results. To use the Slice Tool effectively, you need to have a good understanding of how it works. The Slice Tool is located in the Tools panel, which is located under the crop tool set.
=> Slice Select Tool
The Slice Select Tool allows you to select a specific area of an image and then move or delete that area. The tool can be challenging because it requires a lot of precision. However, it can be a potent tool once you get the hang of it.
Eyedropper Tools Set
The Eyedropper set of Photoshop tools can be challenging to master, but they are essential for any serious Photoshop user. The Eyedropper tool allows you to select a colour from an image and then use that colour in your photo. There are five more tools to apply for a similar task, but those have individual uses. If you want to be a master of Photoshop, you need to know how to use these tools.
=> Eyedropper Tool
The Eyedropper Tool is one of the essential Photoshop tools to master. This tool allows you to select a colour from an image and then use that colour in your photo. The key to effectively using this tool is understanding how to read the colour values. Once you know how to do that, you can use the Eyedropper Tool to select any colour you want. The first thing you need to do is open an image in Photoshop. Once the photo is open, choose the eyedropper tool and click on the sample colour you want to pick. The eyedropper tool will collect the colour sample, and then you can use the colour as per your need.
=> 3D Material Eyedropper Tool
The Photoshop 3D Material Eyedropper Tool is one of the most difficult Photoshop tools to master. It allows you to select and apply 3D materials to objects in your scene. While it may seem daunting at first, with a bit of practice, you’ll be able to use this tool like a pro.
=> Colour Sampler Tool
The Colour Sampler Tool is excellent for quickly and easily sampling colours from an image. To use the Colour Sampler Tool, click on the area of the image you want to test, and Photoshop will display the colour values for that area. You can then use these values to create your custom colours. With some practice, the Colour Sampler Tool can be a great way to get more precise colour results in Photoshop.
=> Ruler Tool
The Photoshop Ruler Tool is one of the most useful Photoshop tools to master. However, once you know how to use it, it can be a powerful tool for creating precise graphics. The Ruler Tool allows you to draw straight lines, measure distances, and create custom shapes. It can create intricate patterns or add a straight line to an image. With a bit of practice, the photoshop Ruler Tool can be helpful for any Photoshop user.
=> Note Tool
The Note Tool allows you to add notes to your photos, which can be helpful when remembering what you did to a particular image or when you’re sharing your photos with others. In addition, the Note Tool can be used to create photo collages and add text to your photos. The Note Tool is an excellent option if you’re looking for a way to make your photos stand out.
=> Count Tool
Count Tool in Photoshop is a powerful but often underutilised tool. It can be used to quickly and easily count objects in an image. Count Tool can be found in the “Tools” palette, under the “Eyedropper” tool. To use the Count Tool, click on the object you wish to count, and the Count Tool will automatically calculate the number of pixels in the thing. A Count Tool can be a great time saver if you need to measure many objects.
Retouching Tools
Many different retouching tools are available in Photoshop, and it can be challenging to know which ones you need. There are a set of retouching tools to use for retouching purposes. Here is the list of elements you should use for retouching:
=> Spot Healing Brush Tool
The Spot Healing Brush Tool is one of the most valuable tools in Photoshop. This tool lets you quickly remove slight imperfections from your photos with a few clicks. However, it can also be easy to overdo it and end up with an image that looks artificial. If you’re not careful, the Spot Healing Brush Tool can be one of the most difficult Photoshop tools. But with some practice, you can learn to use it effectively and create beautiful, flawless photos.
=> Healing Brush Tool
The Healing Brush Tool is one of the most effective and valuable tools in Photoshop. It allows you to quickly and easily remove imperfections from your photos, like blemishes, wrinkles, or scratches. The Healing Brush Tool is also great for repairing damaged photos, like those that have been torn or water damaged. While the Healing Brush Tool is relatively easy to use, it can be tricky to master.
=> Patch Tool
The Photoshop Patch is one of the most difficult Photoshop tools to master. However, once you know how to use it, it can be a potent tool for retouching photos. The Patch Tool allows you to select an area of an image and then replace it with another size of the picture. The patch tool also can be used to fix blemishes, remove objects, or even change the background of an image. While the Patch Tool can be challenging to master, it is valuable for anyone who wants to retouch photos.
=> Content-Aware Move Tool
The Content-Aware Move Tool allows you to move an object in an image while automatically filling in the background. The content-aware move tool can help remove objects from a photo or place them in a new location. However, getting the tool to work correctly can be complicated and often requires a lot of trial and error. If you’re willing to put in the time to learn it, though, the Content-Aware Move Tool can be a powerful tool in your Photoshop arsenal.
=> Red Eye Tool
The Red Eye Tool in Photoshop removes the redness from the eyes in photos. The red-eye tool can be a problematic tool to use, as it requires a good deal of precision. However, with a bit of practice, we can master it. The Red Eye Tool can be found in the toolbox and is typically located near the bottom. To use the tool, click on the photo area you want to fix. The red-eye tool will then attempt to remove the redness from the eyes. If it is unsuccessful, you may need to adjust the settings or try other instruments.
Brush Tools Set
The photoshop Brush Tools are essential for any graphic designer. They are used to create and manipulate images in a variety of ways. We can find the brush tools in the toolbar on the left side of the screen. Brush tool sets include the brush tool and Pencil Tool. Each of these tools has a specific purpose and can be used to create different effects. Several different brush types are available, each with its unique set of features. If you’re serious about Photoshop, you must know how to use the brush tool.
=> Brush Tool
The Photoshop Brush Tools are one of the essential Photoshop tools to master. To use them effectively, you need to have a good understanding of how they work. The brush tool allows you to select a specific area of an image and apply a brush to it. We can use this to create various effects, from adding highlights to darkening shadows.
=> Pencil Tool
Once you know how to use it, it can be a potent tool for creating beautiful images. The Pencil Tool is one of the essential drawing tools in Photoshop. The pencil tool can be used to create lines, shapes, and even shading. The Pencil Tool is located in the Tools palette, which is usually on the screen’s left side. To select the Pencil Tool, click on it in the Tools palette. Alternatively, you can press the letter P on your keyboard.
Clone Stamp Tool Set
The Clone Stamp Tool is a section of photo retouching tools. Here we will find a set of tools that are especially useful for retouching purposes. We can fix the imperfection, rebuild the broken area of any photos, or clone anything using those specific tools.
=> Clone Stamp Tool
The Clone Stamp Tool is one of the most essential and valuable tools in Photoshop. It allows you to copy pixels from one area of an image and paste them into another place. The clone stamp tool can be used to fix flaws or imperfections or to create exciting effects. The Clone Stamp Tool can be challenging to master, but it is essential for anyone who wants to do serious photo editing. With a bit of practice, you’ll be able to use this tool like a pro.
=> Pattern Stamp Tool
The Pattern Stamp Tool is one of the most difficult Photoshop tools to master. However, once you know how to use it, it can be a powerful tool for creating complex designs. The key to using the Pattern Stamp Tool effectively is to have a good understanding of how it works. The Pattern Stamp Tool allows you to create a design using a series of small images called stamps. Each stamp is placed on top of the previous stamp, and the result is a design that looks like it was created with one large image.
=> Colour Replacement Tool
The Colour Replacement Tool can be handy for making quick colour changes to an image. The tool samples a colour from the image and then replaces it with a new colour. The key to using the tool effectively is to use a minimal brush size and be careful not to sample too much of the image, or else the colours will start to look unnatural. With some practice, the Colour Replacement Tool can be a powerful tool for making subtle colour changes to an image.
=> Mixer Brush Tool
The photoshop Mixer Brush Tool allows you to mix colours to create new ones and create different textures. We can use the mixer brush tool to create various effects, from painting to texturing. If you’re looking to add some new skills to your Photoshop repertoire, the Mixer Brush Tool is a great place to start. Photoshop’s Mixer Brush Tool is a versatile tool that we can use to create various effects.
- History Brush Tool Set
In this brush tool section, we will find two types of history brush tools. Those have individual uses. We describe each function.
=> History Brush Tool
The History Brush Tool is one of the most essential and valuable tools in Photoshop. It allows you to paint over an image with a previous version of the image, which can be very helpful for making corrections or changes. The History Brush Tool is located in the toolbar and looks like a paintbrush.
=> Art History Brush Tool
The photoshop Art History Brush Tool can be a potent tool for creating stunning artwork. The Art History Brush Tool allows you to selectively brush away parts of an image, revealing the underlying image beneath. We can use this to create various effects, from subtle shading to complete image transformation.
Eraser Tools Set
If you’re new to Photoshop, the eraser tools can be one of the most challenging things to master. There are various eraser tools available, each with its unique purpose. With a bit of practice, you’ll be able to erase anything you want in Photoshop. The first thing you need to know about the Eraser Tools is that they come in three varieties: the Eraser, Background Eraser and the Magic Eraser.
=> Eraser Tool
We can use photoshop Eraser Tools to erase parts of an image or create exciting effects. If you’re not careful, they can also ruin your photo. That’s why it’s essential to know how to use them correctly. The Eraser Tools are located in the toolbox. To use the Eraser Tool, click and drag it across the area you want to erase. The size of the brush will determine how much of the image is erased.
=> Background Eraser Tool
The Background Eraser Tool allows you to erase the background of an image without affecting the foreground. Background Eraser Tool can help remove unwanted objects from a photo or isolate a subject. The tool can be tricky, but you can learn to control it and produce excellent results with practice.
=> Magic Eraser Tool
The Photoshop Magic Eraser Tool allows you to quickly and easily remove unwanted objects from your photos with just a few clicks. The tool works by sampling the color of the thing you want to remove and then erasing all pixels that match that color. Magic Eraser Tool makes it great for removing small objects, like dust or scratches, from your photos. However, we can also use the tool to remove more critical things, like people or buildings. The only downside to the Photoshop Magic Eraser Tool is that it can sometimes remove too much of the background, leaving your photo looking unnatural.
Blur Tool Set
The Blur Tool Set in Photoshop is a group of tools we can use to create various blurring effects. These effects can add depth to an image or make an object appear out of focus. The Blur Tool Set includes the Blur Tool, Sharpen Tool, and Smudge Tool. Each of these tools has its unique capabilities and can be used to create different types of blurring effects.
=> Blur Tool
we can use the Blur Tool to create various effects, from simulating shallow depth of field to blurring out a background. However, it can be tricky to get the hang of, and even experienced users find it challenging to use. If you’re looking to improve your Photoshop skills.
=> Sharpen Tool
The photoshop Sharpen Tool allows you to create more crisp and focused images. However, once you know how to use it, it can be a potent tool for enhancing your photos. The Sharpen Tool allows you to increase the contrast of an image, making it appear sharper. We can also use it to remove unwanted blurriness from an image. While it takes practice to master, the Sharpen Tool is valuable for any Photoshop user.
=> Smudge Tool
The Smudge Tool can be handy for creating specific effects. The tool allows you to smudge or blur the edges of an image, giving it a softer, more dreamlike look. We can also use it to create light streaks or other effects. If you’re struggling to use the Smudge Tool, don’t worry – plenty of tutorials and guides are available online. You’ll be a pro in no time with a bit of practice.
Dodge Tool Set
The photoshop Dodge Tool is a set of Photoshop tools you need to know. These tools can help your photos look better by making the colors vibrant and the contrast more pronounced. If you’re new to Photoshop, these tools can be challenging, but they’re worth learning if you want to take your photos to the next level.
=> Dodge Tool
The Dodge Tool allows you to lighten or darken areas of an image, depending on your chosen settings. We can use the tool to improve an image’s contrast or make specific areas stand out. While it may take some practice to get the hang of the Dodge Tool, it’s a valuable tool for any Photoshop user to know.
=> Burn Tool
The photoshop Burn Tool allows you to create darkened areas of an image, making them appear burned or charred. Burn tools can significantly affect the creation of dramatic photos, but they can also be challenging to control. If you’re not careful, you can quickly end up with an image that looks unnatural or overdone. For this reason, it’s important to practice using the Burn Tool before attempting to use it on an actual project. With a bit of practice, you’ll be able to create stunning images that will wow your friends and family.
=> Sponge Tool
The Sponge Tool allows you to selectively lighten or darken areas of an image, giving you much control over the final result. However, it can be challenging to get the hang of using the tool, and it’s easy to make mistakes that can ruin your image. If you’re serious about learning Photoshop, the Sponge Tool is one of the tools you need to know.
Text Tool
The photoshop Text Tool Set is a collection of text-related tools in Adobe Photoshop. This set includes the Type tool used to create and edit text, the Character panel, which provides precise controls for character formatting, and the Paragraph panel, which offers similar rules for paragraph formatting. Those text tools are essential for anyone who wants to create professional-looking text in Photoshop. With a bit of practice, you’ll be able to use them like a pro.
=> Horizontal Type Tool
The Horizontal Type Tool is one of the necessary Photoshop tools. It can quickly create wonky, unreadable text if you’re not careful. But when used correctly, it can be a powerful tool for creating beautiful text effects. To use the Horizontal Type Tool, first select it from the toolbox. Next, click on the text you want to type into the document. Finally, use the cursor to position the text where you want it.
=> Vertical Type Tool
The photoshop Vertical Type Tool is another potential tool to decorate the text. However, once you know how to use it, it can be a potent tool for creating beautiful text effects. To use the photoshop Vertical Type Tool, select the text you want to modify. Next, click on the tool icon in the toolbar and select the Vertical Type option.
Pen Tool
The photoshop Pen Tool Set is one of the essential tools you need to know how to use. There are various options for the pen tool, but the two most important are the “path” and “anchor” options. The path option allows you to create a path we can use to create a line or shape. The anchor option lets you place an anchor point on the line or shape to move it around without affecting the rest of the path.
=> Pen Tool
The Photoshop Pen Tool is one of the most difficult Photoshop tools to master. By practicing, you can improve your skills on it. However, once you know how to use it, it can be a potent tool for creating graphics and photo editing. The Pen Tool allows you to create precise lines and shapes in your image. We can use it to create straight lines, curved lines, or even custom shapes. If you’re looking to create professional-looking graphics or edit photos, the Pen Tool is a must-know. If you’re struggling to use the Pen Tool, check out this tutorial for some tips and tricks.
=> Freeform Pen Tool
The Freeform Pen Tool allows you to create an outline around the object with only one click. To do this, you need to have reasonable mouse control. With the Freeform Pen Tool, you can create shapes by click-dragging. Freeform Pen Tool allows you to outline your object more precisely and helps you keep a steady hand.
=> Curvature Pen Tool
The photoshop Curvature Pen Tool allows you to create curved lines and shapes that would otherwise be impossible to start with the standard Pen tool. While it may take some time to get the hang of, the results are well worth it. The Curvature Pen Tool is a must-have if you want to take your Photoshop skills to the next level.
=> Add Anchor Point Tool
The photoshop Add Anchor Point Tool allows you to add anchor points to a line or shape, which we can then use to manipulate the form of the layer. Add Anchor Point Tool can be handy for creating complex conditions, but it can also be very frustrating if you don’t know how to use it properly.
=> Delete Anchor Point Tool
The photoshop Delete Anchor Point Tool allows you to delete anchor points from your line or shape, which can be extremely useful for editing photos. However, accidentally deleting essential parts of your path can be very easy. For this reason, knowing how to use the tool properly is necessary before attempting to use it.
=> Convert Point Tool
The Convert Point Tool can change an object’s shape by moving the anchor points that define its edges. Convert Point Tool can be a handy tool for creating custom shapes, but it can also be very frustrating if you don’t know how to use it properly.
Shape Tools
The Shape Tools Set in Photoshop is a tool essential for creating complex graphics. The set includes the Rectangle Tool, Rounded Rectangle Tool, the Ellipse Tool, the Polygon Tool, Line Tool and the Custom Shape Tool. Each tool has a specific function, and we can use them to create various shapes. If you’re unfamiliar with the Shape Tools Set, learning how to use them before trying to create complex graphics is essential.
=> Rectangle Tool
The Rectangle Tool is one of the most basic and essential tools in Photoshop. It allows you to create various shapes, including squares and rectangles. To use the Rectangle Tool, click on the tool icon located in the toolbar at the top of the screen. Then, select the Rectangle Tool from the list of tools that appears. To create a rectangle, draw a guideline by clicking and dragging your mouse across the screen. Then, use the cursor to specify the width and height of your rectangle.
=> Rounded Rectangle Tool
The Rounded Rectangle Tool can be a powerful tool for creating various effects. This tool can create perfect circles, ellipses, and even 3D objects. The key to using this tool effectively is to understand the multiple options and settings that are available. With a bit of practice, you’ll be able to create unique images with the Rounded Rectangle Tool.
=> Ellipse Tool
We can use the Photoshop Ellipse Tool to create various effects, from simple round shapes to more complex designs. If you’re starting with Photoshop, you may want to avoid this tool until you understand the program better. However, if you’re up for a challenge, learning how to use the Photoshop Ellipse Tool can help you create some truly unique and stunning designs.
=> Polygon Tool
The photoshop Polygon Tool can be a potent tool for creating amazing graphics. It allows you to create detailed, precise drawings using only your mouse. Drag and drop the points you want to make your polygon, and Photoshop will automatically generate the rest.
=> Line Tool
The Line Tool is one of the most basic and essential Photoshop tools. It allows you to draw straight lines, or lines with a curved edge, on your image. While it may seem simple, the Line Tool can be challenging to master.
=> Custom Shape Tool
The Custom Shape Tool is one of the most effective and versatile tools in Photoshop. With it, you can create any shape you can imagine, from simple geometric shapes to complex patterns and designs. You can also use the Custom Shape Tool to draw straight lines by holding down the Shift key while clicking and dragging.
Hand Tool
The photoshop Hand Tool Set is a set of tools that allow you to move and view photos more precisely. These tools are essential for getting the most out of your photos. The collection includes Hand Tool and Rotate View Tool. Each element has a specific purpose, and knowing how to use them can help make your work more flexible. If you’re serious about photography, then learning to use these tools is a must.
=> Hand Tool
The Photoshop Hand Tool is one of the most essential yet often overlooked tools in Photoshop. With this tool, you can move the canvas around without selecting an object or using the scroll bars. Hand Tool comes in handy when you’re zoomed in on a particular area and need to reposition the image. We can also use the Hand Tool to select objects by holding down the [Alt] key (Windows) or [Option] key (Mac) while clicking on the thing.
=> Rotate View Tool
The Rotate View Tool allows you to rotate your image around a specific point, which can be very useful for correcting perspective or creating stimulating effects. To use the Rotate View Tool, click on the image you want to rotate. Then, select the Rotate View Tool from the toolbar and click on the point you want to turn your picture around.
Zoom Tool
The Zoom Tool is one of the basic tools found in Photoshop. It allows you to increase or decrease the magnification of your image. By default, the zoom tool is set to 100%. To use the zoom tool, simply click and hold down the mouse button on the area of the image you wish to zoom in on. You can also click and drag to draw a box around the area you wish to zoom in on. To zoom out, hold down the Alt key (Windows) or Option key (Mac) and click on the image.
Final Words
Our core aim was to explain every single Photoshop tools and functions. Adobe Photoshop is an excellent option if you’re looking for powerful photo editing software. With its many useful tools and features, you can easily edit your photos to create stunning images. It can be challenging to learn how to use all of the features. Luckily, Adobe Photoshop has several helpful tutorials that teach you the basics.
If you want to create a professional-looking image, you’ll need to use some of the more advanced features of Adobe Photoshop. Starting, you can get by with the basic features. Adobe Photoshop has various filters and effects that you can use to enhance your photos. Be safe and learn more.