Have you ever tried to take a picture of your food only to make it look less than appetizing? If so, you’re not alone. Taking photographs of food can be tricky, but with a few simple tips, you can make your photos look mouth-wateringly delicious. As a food photographer, you have the unique opportunity to capture the deliciousness of your subject matter in a way that will make others’ mouths water. But how do you take great food photos? Here are some Food Photography Guide to get you started:
- Start with good lighting. Natural light is always best, but avoid using flash if you’re shooting indoors. Instead, set up your shots near a window or use overhead lighting.
- Use props to make your photos more interesting. Plates, napkins, utensils, and other items can help add color and texture to your images.
- Get close-up shots. When photographing food, it’s essential to get close enough so that viewers can see all the details. Use a macro lens or zoom in as much as possible without sacrificing image quality.
10 FOOD Photography TIPS (From beginner to advanced)
Things to Remember When Taking Food Photos
1. Use natural lighting whenever possible. Light from a window or the sun will make your food look more appealing than artificial light.
2. Make sure the background is clean and uncluttered. A messy countertop or tablecloth will remove the beauty of the dish you’re trying to photograph.
3. Get close up! Take close-up shots of individual items on the plate or focus on one dish aspect. It will help the viewer see all the details and appreciate the colors and textures of the food.
4. Be creative with your angles. Try shooting from above or at an angle for exciting results. Just make sure not to block any part of the dish with your hands or utensils!
Tips to Get Started in Food Photography
Keep a few things in mind if you want to get started in food photography. First, it is essential to have a good camera. A DSLR camera will give you the best results, but you can also get good results with a point-and-shoot or even a smartphone camera if you know how to use it well.
Second, lighting is key in food photography. Natural light is always best, so take photos near a window or outdoors if possible. If you’re using artificial light, make sure it’s not too harsh or bright – diffused light is ideal.
Third, composition is essential when taking any photo, especially food photography. Try to make your subject the star of the image by keeping the background simple and uncluttered. And finally, don’t be afraid to experiment!
The best way to learn is by trial and error, so go ahead and play around with different settings and ideas until you find what works best for you.
Secrets to Be a Good Food Photographer
A food photographer captures food images for advertisements, packaging, cookbooks, and other similar purposes. A good food photographer should understand composition, lighting, and color strongly. They should also be able to make the food look appetizing and appealing to the viewer.

Food Photography Tips iPhone
If you’re anything like me, you love taking photos of your food. And if you’re also like me, you could use your iPhone. Here are some tips and tricks to help you take the best food photos with your iPhone!
1. Use the HDR setting HDR stands for High Dynamic Range, and it’s a great setting to use when taking food photos. It helps to even out the lighting in your image and makes everything look more vibrant and colorful. To turn on HDR, go to Settings > Camera > HDR and slide the toggle to On.
2. Find the right angle The angle at which you take your photo can make a big difference in how it looks. For example, if you’re taking a picture of a plate of food, try angling the camera so that the light is coming from behind the plate (this is called backlighting). It will make the colors in your photo pop and create a stimulating effect.
3. Use natural light whenever possible. Natural light always looks best in photos, so try to take advantage of it whenever possible. If you’re indoors, sit near a window or step outside for a few minutes before taking your photo.
4. Edit your photos afterward
There are tons of great editing apps available for iPhone (my favorite is VSCOcam), so don’t be afraid to experiment with them! A little editing can go a long way in making your photos look even better.
Food Photography With Phone
Like most people, you probably take more photos with your phone than with any other device. If you’re a food lover, chances are good that some images are of food. So how can you make your food photos look their best?
Here are a few tips: 1. Use natural light whenever possible. Sunlight is the best for photography, so try to position your dish near a window or outside.
If it’s not possible to get good natural light, artificial lighting can work, too 1. Be sure to avoid using flash.
2. Pay attention to the background. A busy environment can distract you from the main subject of your food! Try to find a simple set that won’t compete for attention with the dish itself.
3. Get in close. Getting close to your subject will help it stand out in the photo and allow you to capture all the delicious details.
4. Use the zoom feature on your phone camera if necessary – be careful not to get too close and obscure part of the dish with your finger!
Food Photography Lighting
In food photography, lighting is everything. The right light can make or break a photo, so it’s essential to understand how to use it to your advantage. Here are some tips for getting the perfect light for your food photos:
1. Use natural light whenever possible. Natural light is always the best option for food photography because it makes food look its best. If you’re taking photos indoors, try to position your subject near a window so that you can take advantage of the natural light coming in.
2. Use diffused light when shooting outdoors. Direct sunlight can be harsh and create unwanted shadows on your subject matter. To avoid this, try diffusing the morning using a white sheet or fabric between the sun and your subject matter.
It will help soften the light and prevent those pesky shadows from appearing in your photos.
3. Pay attention to the background lighting as well as the foreground lighting. When setting up your shot, be sure to take into consideration both the background and foreground lighting.
Depending on what kind of mood you’re trying to capture with your photo, you may want different types of lighting in each area. For example, dimmer background lights with softer foreground lights might work well if you’re going for a romantic vibe. On the other hand, if you want to capture a more energetic feel, brighter lights in both areas could be just what you need.
Play around with different combinations until you find something that works well for your scene.
Food Photography Settings

As a food photographer, there are a few things you need to consider when setting up your shots. Here are some essential tips to help you get started:
1. Lighting is critical. Regarding food photography, lighting can make or break your picture. Be sure to use natural light whenever possible, and if you’re using artificial light, be sure it’s diffused so that it doesn’t create any harsh shadows.
2. Pay attention to composition. As with any photography, the document is essential in food photography. Be sure to consider the Rule of Thirds, and try not to have your subject matter too close to the edges of the frame.
3. Use props wisely. Props can help add visual interest to your photos, but be sure not to overdo it – too many props can clutter up your shot and take away from the focus on the food itself. Choose props that complement the colors and style of the dish you’re shooting, and avoid anything too busy or distracting.
4., Keep it simple.
Food Photography Equipment
If you’re serious about food photography, you’ll need more than just a smartphone. You’ll need a digital single-lens reflex (DSLR) camera and some high-quality lenses to get the best shots. But even the best equipment will only help if you know how to use it.
Here’s a rundown of the must-have equipment for food photography, as well as some tips on how to get started.
DSLR Camera: A digital SLR camera is essential for food photography. Look for one with at least 16 megapixels and an APS-C sensor size. It will give you plenty of detail and allow you to crop your photos without losing quality.
Lenses: You’ll need at least one lens for your DSLR camera, but two or three would be even better. A 50mm prime lens is an excellent all-purpose option, while a wide-angle lens is perfect for capturing entire scenes. Look for a macro lens if you want to get close-up shots of details like ingredients or textures. You’ll need at least one lens for your DSLR camera, but two or three would be even better.
Tripod: A tripod is critical for getting sharp photos, especially when shooting in low light conditions or using long exposures. It will also come in handy if you want to take self-portraits or group shots.
Flash: An external flash can be very helpful when taking pictures of food, especially in dimly lit restaurants. It can also add definition and shape to flat surfaces like countertops.
Remote shutter release: A remote shutter release lets you take pictures without touching the camera, which can cause vibrations that blur the image. It’s also great for taking self-portraits or group shots.
Lens hoods: Lens hoods block out unwanted light and help prevent glare and reflections. They’re beneficial when shooting outside on bright days.
Filters: Filters can change your photos’ color, contrast, and exposure.
Food Photography Guide & Tips for Beginners
There are few things more mouth-watering than an excellent food photograph. The colors, textures, and light, all of these elements can create a truly stunning image. But if you’re new to food photography, knowing where to start can be daunting.
Here are a few tips to help you get started:
1. Use natural light whenever possible. Sunlight will give your photos a warm and inviting feel. If you need to use artificial light, try placing your subject near a window or using a diffuser to soften the light.
2. Pay attention to composition. Just like with any other type of photography, design is critical in food photography. Try experimenting with different angles and camera placements until you find something that looks good to you.
3. Focus on the details. Small details like water droplets on vegetables or crumbs on a plate can add interest and texture to your photos. A macro lens will come in handy for this kind of shooting.
4. Experiment with props; finding the proper support for your food shoot can make all the difference. Think about the color, texture, and scale when choosing plates, flatware, linens, etc
5 Be patient. Rome was built a day ago, and neither is the perfect food photo. It takes time (often many tries)to get everything right.
Food Photography Hacks
Are you passionate about food and photography? Do you find yourself drooling over pictures of food in magazines, blogs, or even on your friends’ social media pages? If you answered yes to any of these questions, this post is for you!
With the popularity of food photography on the rise, there are many ways to make your photos stand out from the rest. Here are a few food photography hacks that will help you take gorgeous photos that will make everyone’s mouths water:
1. Use natural light whenever possible. Lighting can make or break an image, so try to take advantage of natural light whenever possible. Suppose you’re shooting indoors, set up near a window with plenty of sunlight. And if you’re shooting outdoors, try to find a spot that’s not too shady or too sunny.
2. Get close-up shots. When it comes to food photography, close-up shots are always eye-catching. They allow viewers to see all the details and textures of the dish, which is sure to whet their appetite! So when taking photos of food, feel free to get in close.
3. Play with angles. Instead of always shooting from eye level, experiment with different angles for a more interesting shot. Get low and shoot up at the dishes, or prop your camera up on a stool or chair and shoot down at them. You could even try shooting from above using a ladder or step stool (be careful!).
4. Use props wisely. Props can add interest and dimension to your photos, but use them sparingly not to overwhelm the shot. A few well-chosen props – such as color plates, linens, or cutlery – can really make your photo pop. But too many props will clutter up the frame and take away from the focus of your shot: the food!
BONUS TIP: Edit like a pro. Some easy editing tricks can transform your photos even if you don’t consider yourself a Photoshop wizard. For instance, playing around with the brightness, contrast, and saturation levels can make colors “pop”; adding a vignette effect can give your photo an elegant, polished look. You can do tons of other simple edits to take your photos from good to great – so have fun experimenting!
Food Photography Guide Blog
Are you passionate about food and photography? Do you love to cook and take pictures of your food? If so, then a food photography blog may be the perfect outlet for your creativity!
A food photography blog is a great way to share your recipes and photos with the world. It can also be an excellent resource for others looking for new ideas and inspiration. Here are some tips to get started:
1. Find your niche. What kind of foods do you like to photograph? Do you have a particular style or approach that you prefer? Narrowing down your focus will help you stand out from the crowd.
2. Start small. You don’t need a fancy camera or an extensive portfolio to get started. Just start sharing your photos and recipes and build up from there.
3. Be consistent. Posting photos and articles regularly on your blog will help grow your audience and keep them coming back for more. Aim for one to two posts per week to start, and then increase as you’re able to maintain it.
4. Engage with other bloggers.
5. Try to update your previous articles with the appropriate information.
How Do You Stage Photos for Food?
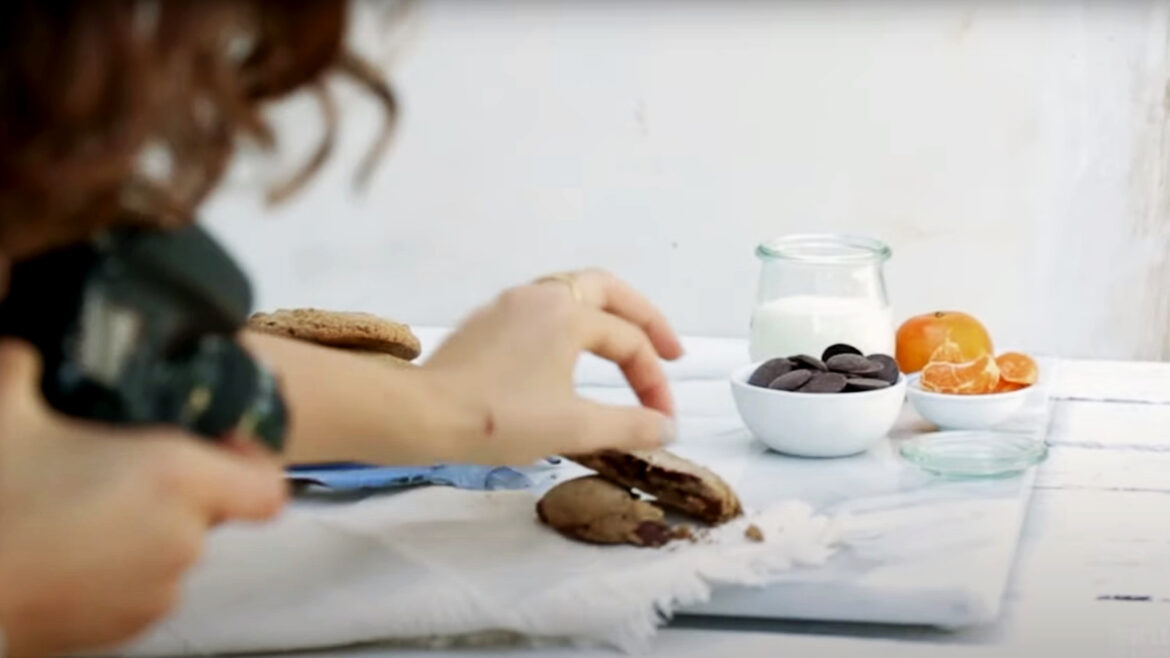
When it comes to staging photos for food, you can do a few things to make your shots look their best. First, look at the background and see if there is anything you can do to make it more attractive. It may mean moving some furniture around or adding some decorations.
Next, please focus on the food itself. Make sure it is arranged appealingly and that the colors are complementary. Finally, think about the lighting in the room and see if there are any changes you can make to create a more flattering effect.
With a little effort, you can stage photos that will pop!
What Aperture Should I Use for Food Photography?
Aperture is one of the three basic settings on a camera that affects the exposure of your image, along with shutter speed and ISO. A larger aperture (smaller f-number) results in more light entering the camera and a smaller depth of field, while a smaller gap (larger f-number) does the opposite. So which aperture should you use for food photography?
For most food photos, you’ll want to use a relatively small aperture to get a considerable depth of field. It will ensure that all your ingredients are in sharp focus, from the front to the back. A good starting point is around f/8 or f/11.
You can experiment with larger or smaller apertures to see what looks best with your subject matter. Remember that a tiny notch will require longer shutter speeds, so you’ll need to either use a tripod or ensure your hands are very steady when taking the photo.
Conclusion
If you’re passionate about food and photography, then learning to take amazing photos of your culinary creations can be a fun and rewarding experience. But where do you start? This comprehensive guide will teach you everything you need about food photography, from choosing the right equipment to creating stunning compositions.
You’ll learn to choose the right camera and lenses for food photography and set up your shots for maximum impact.
Use lighting techniques to make your food look its best – Edit your photos like a pro. So whether you’re shooting for a blog, cookbook, or just for yourself, follow these tips and tricks, and you’ll be taking mouth-watering photos in no time!
