
As a fashion blogger or e-commerce store owner, it’s important to have great product photos. One way to make your photos stand out is to take pictures of clothes without a mannequin or dummy. By doing this, you’re showing your viewers that you’re capturing the true fashion style of your followers. This process can be a challenge, but if you know How to take pictures of clothes without a mannequin, you’ll be able to take beautiful photos of your clothes.
To take pictures of clothes without a dummy, here we explain some exclusive tips to do it. Follow these simple tips, and you’ll be able to take great product photos that show off your fashion style.
The Pros and Cons of Photographing Clothing Without a Mannequin
There are both benefits and drawbacks to photographing clothing without a mannequin. Below are the comparative advantages and disadvantages:
| The Benefits | The Drawbacks | |
|---|---|---|
| One benefit is that you can get a more natural look for the clothing. | One drawback is that the clothing can look less stylish without a mannequin to show it off. | |
| Another benefit is that it can be more cost-effective, as you will not need to purchase or rent a mannequin. | Additionally, taking pictures of clothing without a dummy can be quicker and easier, as you will not need to set up the dummy and arrange the clothing on it. | |
| However, one drawback is that clothing can appear wrinkled or creased when photographed without a dummy, giving the impression that the clothing is of poor quality. | Additionally, it can be more difficult to show how the clothing looks when worn without a mannequin to fill out the clothing. | |
| One advantage is that it can help to make the clothing look more natural as if a real person is wearing it. It can be helpful when trying to sell clothing, making it look more appealing to potential buyers. | Downside is that it can be more difficult to get the clothing to stay in place without a dummy, and it may be necessary to use pins or other fasteners to keep the fabric from moving around too much. | |
| One advantage is that it is easier to photograph clothing without a dummy because you do not have to worry about positioning the clothing on the mannequin. | Disadvantage is that it can be more difficult to position the clothing without a dummy, which may not look as nice in the photographs. |
Overall Thought About Benefits And the Drawbacks
Whether or not to photograph clothing with or without a dummy depends on the desired look and feel of the final product. There are many factors to consider, and the decision ultimately lies with the photographer. However, some guidelines you can follow to ensure the best results.
If the goal is to create a realistic and natural look, it is best to photograph clothing without a dummy. It will allow the clothing to lay naturally and will avoid any awkward posing that may occur with a mannequin.
Using a dummy may be the best option if the goal is to create a more editorial look. It will allow for more control over the positioning of the clothing and can help to create a more dramatic look.
Tips to take pictures of clothes without mannequin
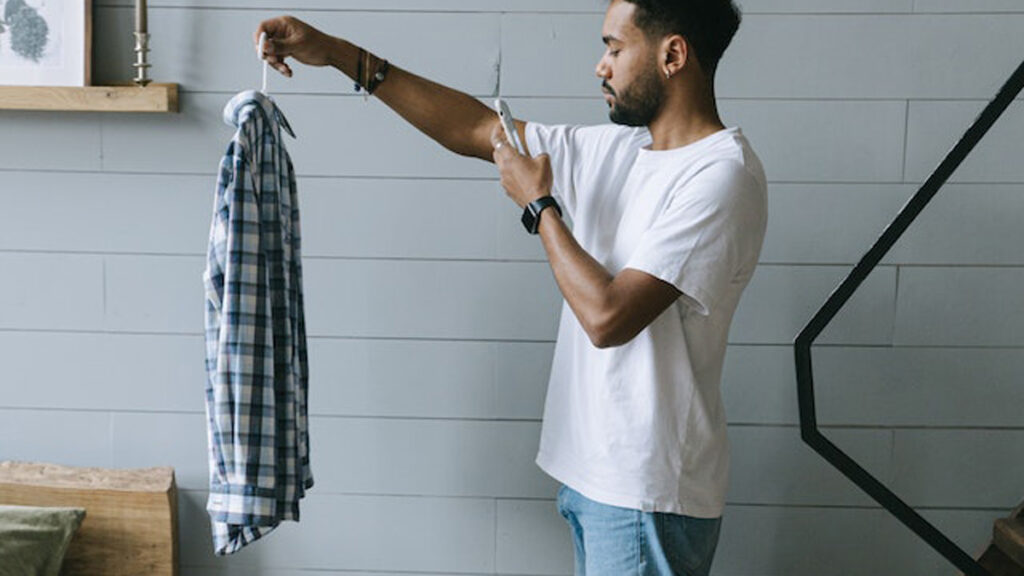
If you want to take pictures of clothes without a dummy, you can do a few things. First, try hanging the clothes on a clothesline or hanger. You can also lay the clothes flat on a surface, like a bed or a table. If you’re taking pictures of clothing for an online store, you might want to invest in a mannequin head or dress form. It will help your clothes look their best in photos. Finally, make sure to use good lighting when taking pictures of clothes. Natural light is always best, but you can also use artificial lighting to get the right effect.
To take pictures of clothes without a mannequin, you’ll need a camera and some accessories:
- Set up your camera so that it’s pointing towards the clothes.
- Use the adjustable settings to get the perfect shot.
- Remove the dummy from the scene to show your viewers how the clothes look on a real person.
- Use natural light. The best way to take great product photos is to use natural light.
- This technique will help achieve this by using an open window, a door, or a bright light source like a flash. By using natural light, you’ll be able to show off the texture and color of your clothes more naturally.
- Take pictures from different angles. When taking pictures of clothes without a dummy, it’s important to take pictures from different angles. It will help you to capture the different details and proportions of the clothing.
- Use a mannequin head or dress form. If you’re taking pictures of clothing for an online store, using a mannequin head or dress form can be helpful. It will help your clothes look their best in photos. Additionally, a mannequin head or dress form can help you to get accurate measurements for your garments.
- Use adjustable settings. One of the best ways to take great product photos is to use adjustable settings. It will help you to achieve using a tripod or handheld camera with a wide-angle lens. By using adjustable settings, you’ll be able to get pictures that are both high quality and flattering.
- Taking close-up shots will allow people to watch on their computer screen what the actual outfit looks like – which allows them better visualization for when they go shopping for themselves at online stores
Flat Lay Photography is a New and Innovative Way to Take Pictures of Clothes Without a Mannequin
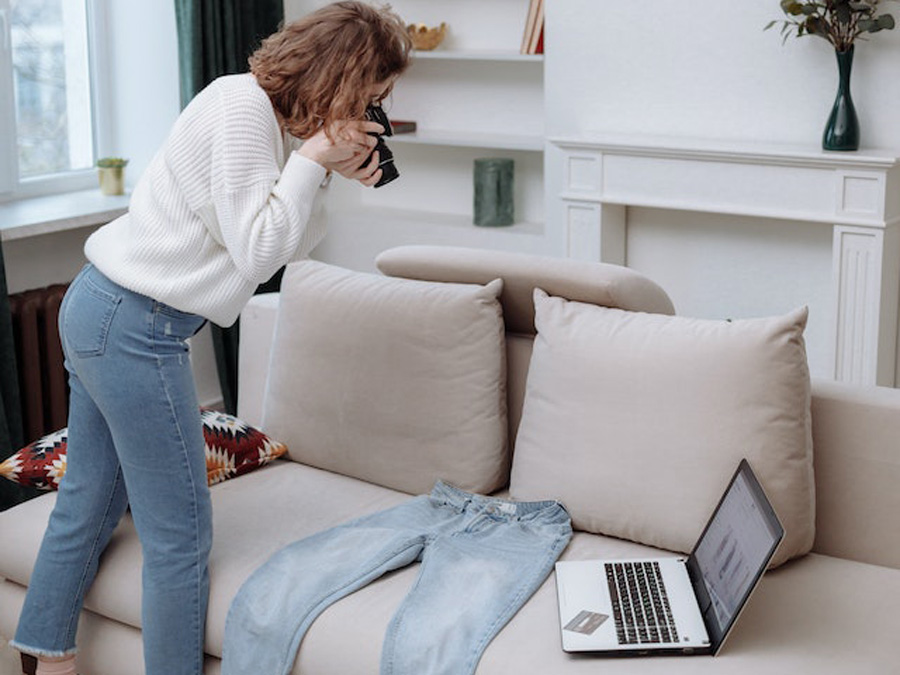
Flat lay photography is a style of photography that involves taking pictures of objects from a bird’s eye view. This photography style mostly applies to product photography, particularly for clothes. One of the benefits of flat lay photography is that it can capture without a dummy, making it a more cost-effective option for businesses.
Also, flat-lay photography can show off the details of a garment, such as patterns or stitching. Flat-lay photography is a great option if you’re interested in taking pictures of clothes without using a dummy.
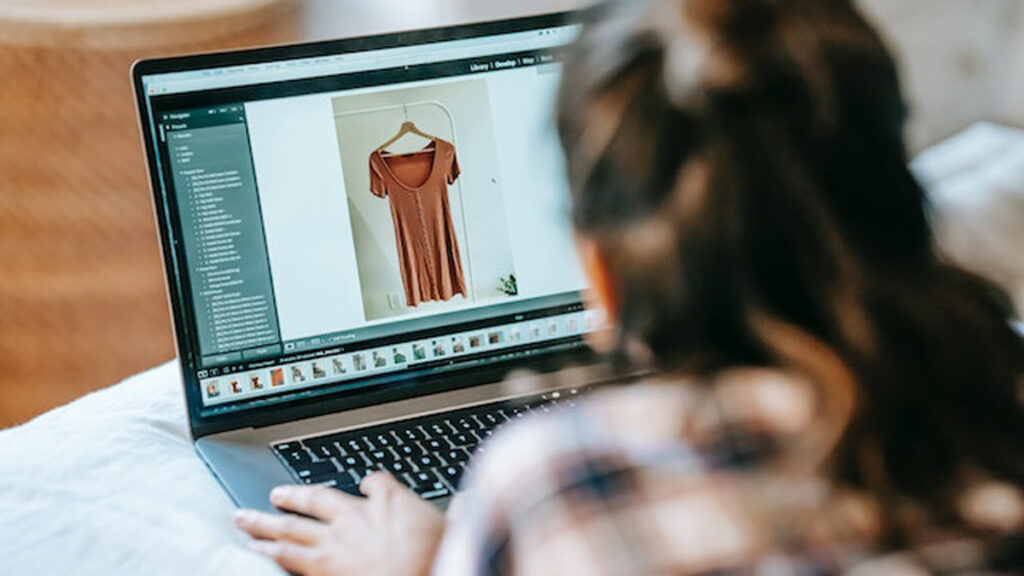
Why Should You Post-process after Flat Lay Photography?
Flat-lay photography is a great way to take pictures of clothes without using a dummy. This type of photography can apply to show off an outfit, highlight a particular garment detail, or simply create a stylish and modern look.
Flat-lay photography is a great option if you’re interested in taking pictures of clothes without using a dummy. However, flat-lay photography can sometimes result in too busy or cluttered pictures. Post-processing can help to fix this by removing unwanted elements and creating a more polished final image.
Here are some quick tips for editing flat-lay photos in Photoshop.
- Use the Clone Stamp Tool to create a flawless image by removing any distractions.
The Clone Stamp tool can remove unwanted elements from your photo. Select the tool from the toolbar, then click and drag over the area you want to clone. Release the mouse button to apply the changes.
- Crop the Photo for a Cleaner Composition
If your photo is too busy, you can crop it to remove distractions and create a cleaner composition. To do this, select the Crop tool from the toolbar, then click and drag over the area you want to keep. Apply your changes by pressing Enter or Return.
- Adjust the Levels for Better Contrast
We can use Levels to adjust the contrast of your photo. Select Image > Adjustments > Levels from the menu bar to do this. In the Levels dialog box, drag the black and white sliders inwards until they touch the histogram. Click OK to apply the changes.
- The Hue/Saturation tool can use to add more life to photos. To do this:
- Select the tool from the toolbar, then click and drag over the area you want to change.
- In the Properties dialog box, click the Hue slider to the left to adjust the color, then click and drag over the area you want to change the hue of.
- Click the Saturation slider to the right to adjust the saturation, then click and drag over the area you want to change the saturation of.
Dragging both sliders slightly right and left will usually work best when editing images with many different colors. Finally, press OK if necessary, so the picture fits on one page!!
Ghost Mannequin Photo Editing Service
If you’re selling clothes online, one of the best ways to showcase your items is with a ghost mannequin photo. This photo editing service allows you to take pictures of clothes without a dummy, making your items look more professional and appealing to potential buyers. There are a few different ways to take ghost mannequin photos, and the best method for you will depend on the type of clothing you’re selling and the style you’re going for.
Whether a fashion blogger or an online retailer, ghost mannequin photos are a great way to make your clothes look their best.
Ghost mannequin images are created by removing the dummy from the photo using Photoshop. It leaves the clothes looking floating in mid-air, a great way to show off your clothing without worrying about the mannequin getting in the way.
If you’re not familiar with Photoshop, don’t worry – You need to take the photos and find someone who provides a ghost manipulation photo editing service. Go to google and search for photo editor. You can try clipping the photos team to do this for you.
Final Words
After reading all these articles, Already you know the secret of the photography of clothing. Following these simple tips, you can take great product photos of clothes without using a dummy. It can help you save money and time while showing off your fashion style. With a little practice, you can take stunning product photos of clothes in no time at all.