
Landscape photography is a great way to capture the beauty of nature, and it can be a very rewarding experience. However, knowing how to properly shoot landscape photography is important, as it can be quite challenging. Here, I’ll share tips and tricks on How to shoot landscape photography. No matter your level of experience, we have something for everyone. So grab your camera, and let’s get started!
Landscape Photography Tips
Are you interested in landscape photography? There are a few things to keep in mind when shooting landscape photography. Don’t forget to edit your photos afterward to bring out the best in them. You’ll be able to take amazing landscape photos with these tips in mind. Here are some quick tips to get you started.
Get to know your camera.
Landscape photography is a genre that typically involves capturing images of natural scenery, such as mountains, forests, rivers, and other outdoor locations. Knowing how to use your camera to its full potential is important; it means understanding things like aperture, shutter speed, and ISO so that you can take stunning photos. With a little practice, you can learn to take advantage of your camera’s features to create beautiful landscape photographs.
Find a good location for landscape photography.
A good landscape photo starts with a good location. Look for interesting scenery with a good mix of foreground, middle ground, and background elements. Avoid locations that are too cluttered or have distracting elements.
The best place to shoot depends on the type of landscape you’re trying to capture. Suppose you’re looking for mountains, head to the Rockies or the Himalayas. For beaches, the Caribbean or the Maldives are ideal. And for forests, anywhere from Alaska to Patagonia will do. The key is researching and finding a place that suits your style. Once you’ve found your spot, don’t forget to consider the time of day and the weather conditions. These can make a big difference in the quality of your photos.
Use a Tripod for perfect landscape photography.
A tripod is a key piece of gear for any landscape photographer looking to capture stunning images. A tripod will stabilize your camera, allowing you to take sharp, blur-free photos. It also lets you shoot in low light conditions and capture long exposures. If you’re serious about landscape photography, a tripod is a must-have. A perfect tripod is especially important when shooting in low light or at night.
landscape photography Shoot in Manual Mode
In landscape photography, shooting in manual mode gives you the most control over your camera and allows you to capture the scene exactly as you see it. As a quick tip, you can set your aperture to a low number to create a large depth of field. It will ensure that all the elements in your scene are focused and set your shutter speed to a slow speed to capture the motion of the water or the wind. Use ISO to adjust the sensitivity of your camera so that it can handle low light conditions.
Lenses for landscape photography
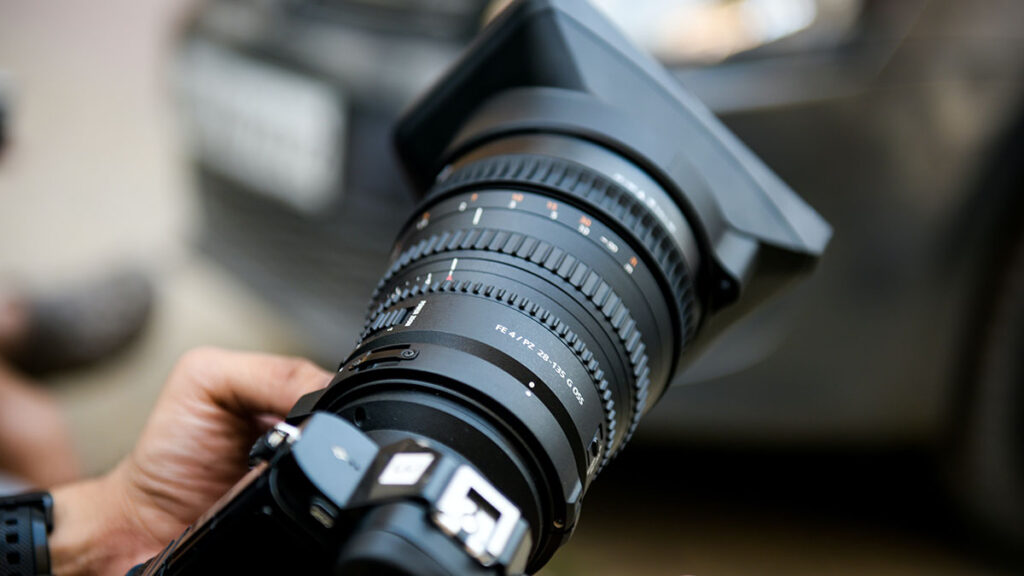
When shooting any photography, the lens you use will greatly affect your final images’ overall look and feel. For landscape photography, we typically use wide-angle lenses to capture a large swath of land in a single frame. It is especially useful when shooting grand vistas or sweeping mountain ranges. Wide-angle lenses typically have a field of view of 35mm or less.
However, there are also times when a telephoto lens might be more appropriate for the scene you are trying to capture. Telephoto lenses have a much narrower field of view than wide-angle lenses and are better suited for zooming in on a specific subject within the landscape. It can be useful for isolating a particular tree or mountain peak within a large and complex scene. Telephoto lenses typically have a field of view of 70mm or more.
When choosing a lens for landscape photography, it is important to consider the overall look and feel you hope to achieve with your final images. Wide-angle lenses will give your photos a sense of expansiveness, while telephoto lenses will allow you to focus on specific details within the landscape. Ultimately, the best lens for landscape photography is the one that will help you capture the particular scene that you have in mind.
Shoot landscape photography in RAW Format
If you want full control over the editing process, RAW files are the best way to capture images. They are larger than JPEGs and take up more space on your memory card, but they offer much more flexibility in post-processing. If you’re serious about landscape photography, shooting in RAW is the way.
Shoot landscape photography in Low Light Conditions
With the right techniques, shooting landscape photography in low-light conditions can produce stunning results. It will allow you to capture more detail in the shadows and highlights of the scene. It’s also important to shoot in low light conditions when shooting portraits because it will allow you to capture more detail in the shadows and highlights of the face.
Use a Slow Shutter Speed for landscape photography.
A slow shutter speed is key for landscape photography, as it allows you to capture the movement of the clouds or river flow. It also allows you to capture a greater range of light, from the brightest highlights to the darkest shadows. You will need a tripod to keep your camera steady to shoot with a slow shutter speed. You will also need to use a low ISO setting to avoid introducing too much noise into your image. Finally, use a remote shutter release or self-timer to avoid shaking. Following these tips, you can capture stunning landscape photographs with a slow shutter speed.
Use aperture Priority Mode for landscape photography.
Aperture priority mode is a great choice for landscape photography because it allows you to control the depth of the field. The amount of the scene that appears in focus is the depth of field. A small depth of field means that only a small part of the scene will be in focus, while a large depth of field means that most of the scene will be in focus. By controlling the depth of field, you can choose how much of the scene you want in focus.
For example, if you want to focus on a specific object in the foreground, you would use a small depth of field. If you want the entire scene to be in focus, you will use a large depth of field. Aperture priority mode allows you to choose the depth of field you want, which is why it’s a great choice for landscape photography.
Use Manual Exposure for landscape photography.
Landscape photography is all about capturing the beauty of the outdoors. To do this justice, you need to manually control your camera’s exposure. That means understanding the relationship between aperture, shutter speed, and ISO and then adjusting these settings to get the desired results. It takes practice, but once you get the hang of it, you’ll be able to produce stunning landscape photos that capture the scene’s essence.
Capture Movement & Motion with Long Exposures for landscape photography
You’ll need to use a long exposure to capture movement and motion in your landscape photography. That means keeping your camera shutter open for a longer period, which allows more light to enter the camera and produces a blurrier image. Set your camera to manual mode and select a slow shutter speed, such as 1/4 second. Then, set up your tripod and compose your shot.
Once you’re ready, press the shutter button and hold it down for the duration of the exposure. Be sure to keep your camera still during the exposure to avoid blurring the image. Review your image and make any necessary adjustments when you finish your photo shooting. With practice, you’ll be able to capture beautiful, blurred images of the world around you.
Use a flash for landscape photography.
Using a flash for landscape photography can help you to create more interesting and dynamic images. By using a flash, you can add light to your landscape photos, which can help to bring out details and add depth. In addition, using a flash can also help to freeze motion, which can be helpful when photographing moving subjects like waterfalls or rivers. If you’re interested in using a flash for landscape photography, there are a few things you need to keep in mind:
- choose the right flash for the job.
- Need to know how to properly position the flash.
- You’ll need to know the pitfalls of using a flash, like creating unwanted shadows.
Shoot in RAW Format for landscape photography
One of the most important things you can do to improve your landscape photography is to shoot in RAW format. RAW files are much larger than JPEGs and contain much more information, giving you more flexibility when editing. They also tend to have better dynamic range and color depth. While shooting in RAW takes up more space on your memory card and requires more processing power, it’s worth it for the improved quality. If you’re serious about landscape photography, start shooting in RAW.
Experiment with Settings
When shooting landscape photography, it’s important to experiment with different settings on your camera. It will allow you to find the settings that work best for you, and it will also help you to create the image that you are looking for.
By following these tips, you’ll be able to take amazing landscape photos that will stunningly capture the beauty of nature. Remember to take your time when shooting landscape photography. Don’t try to rush through the process, and don’t be afraid to take your time to get the perfect shot. With patience and experimentation, shooting landscape photography can be a very rewarding experience.
Panoramas
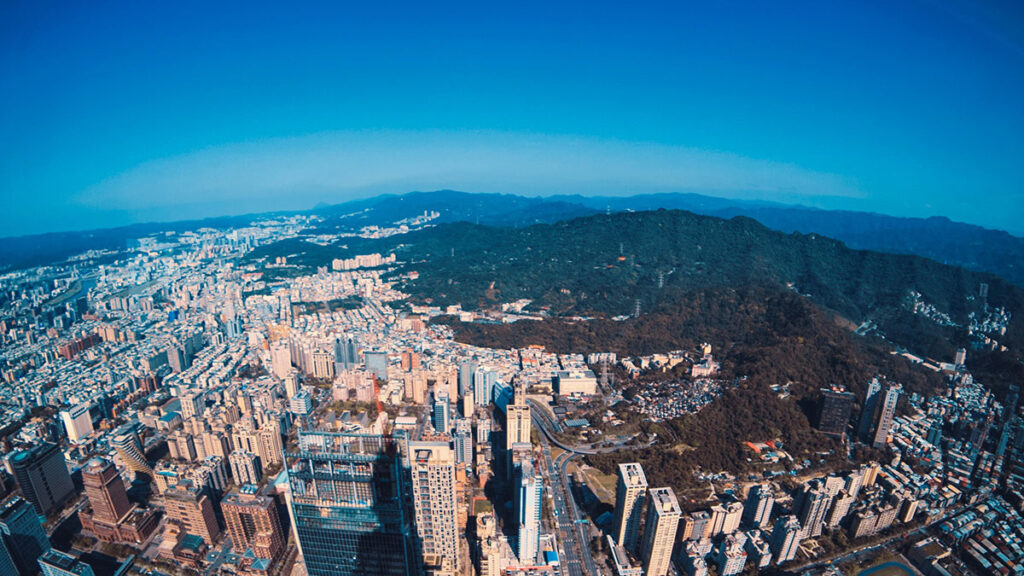
A panorama is a landscape photography technique where multiple images together to create one large stitched image. We naturally apply the panorama technique in cases where the normal field of view of the camera lens is insufficient to capture the entire area. The Panorama can use to create a more immersive image for aesthetic purposes.
There are two main methods of creating a panorama:
-The first is to use an automated software program to stitch the images together.
-The second method is manually aligning and overlapping the images yourself before stitching them together using an editing program such as Photoshop.
Both methods have advantages and disadvantages, so it’s up to you to decide which one you want to use. If you’re new to panoramas, we recommend starting with an automated program like Hugin or Pano Tools, as they will be much easier to use and produce good results. If you’re feeling confident, then give manual stitching a try!
HDR Photography
HDR Photography is a technique that allows you to capture more detail in the light and dark areas of an image than in a stock photo. To create an HDR image, you take multiple photos at different exposures and combine them into one image. We can try it with any camera, but specific HDR cameras are also on the market.
To shoot HDR photos, you’ll need a camera that allows you to set the exposure manually. You’ll also need a tripod to keep the camera still while taking multiple photos at different exposures. If you don’t have a tripod, try using a stack of books or something else to keep the camera steady.
Once you have your camera and tripod set up, take three or more pictures of the same scene at different exposures. For example, you might take one picture at the brightest exposure, one picture at the darkest exposure, and one picture in between. Make sure to overlap the pictures, so they line up perfectly when you combine them later.
After you’ve taken all your photos, download them to your computer and open them in an HDR processing program. There are many other programs available, both paid and free. Once you’ve loaded your photos into the program, follow the instructions to combine them into a single HDR image.
HDR photography can create beautiful images with amazing detail and clarity. With practice, anyone can learn how to shoot great HDR photos!
Post-Processing
In landscape photography, post-processing enhances a photo after you have captured it. We can manipulate a digital photo in many ways to change the look and feel of the original image, and We can use various software programs to enhance the photos.
The most important thing to remember about post-processing is that less is more. It’s very easy to go overboard and end up with an image that looks artificial and unreal. A few simple tweaks can make a big difference, but you don’t want to lose the natural beauty of the scene you’ve captured.
Post-processing can correct exposure, contrast, white balance, and sharpness problems. It can crop the image, add filters or effects, and even change the colors of the sky or landscape.
There are endless possibilities for post-processing, but it’s important to use restraint. Start with small changes and see how they affect your image before making more drastic adjustments. With a little practice, you’ll be able to produce stunning landscape photos that look straight out of a magazine!
Final Words,
Thanks for reading! I hope these tips and tricks help you shoot stunning landscape photography. Photography should be enjoyable, so experiment and find your style. We love hearing from you! If you have any questions or suggestions, please don’t hesitate to leave a comment below. Happy shooting!